I keep seeing the same pattern: the design is done in Webflow, the site is working, and then the hosting bill becomes the part nobody wants to defend. When the project is stable and portability matters more than staying inside one platform, I prefer exporting it cleanly and deciding where it should live next. That is where ExFlow is useful. You paste the URL, export the pages and assets you need, and keep the option to host the site yourself or sync it into Git, S3, or FTP.
If you want the short version, this is the checklist I use for a Webflow site I want to turn into static HTML without guessing.
1. Decide Whether Static Export Is The Right Move
I would only export a Webflow site when the site has crossed the line from “actively designed in Webflow” to “mostly finished and better off portable.” That usually means one of three things:
- The site is a marketing site, landing page, docs hub, or content site that does not need a live editor every day.
- The team wants a lower-friction hosting setup than the one they have now.
- The site needs a fallback copy that can move into another hosting environment without rebuilding everything from scratch.
This is where ExFlow matters. It is not trying to replace Webflow as a design tool. It is the escape hatch when you want the Webflow output as downloadable static content instead of being pinned to the hosted setup.
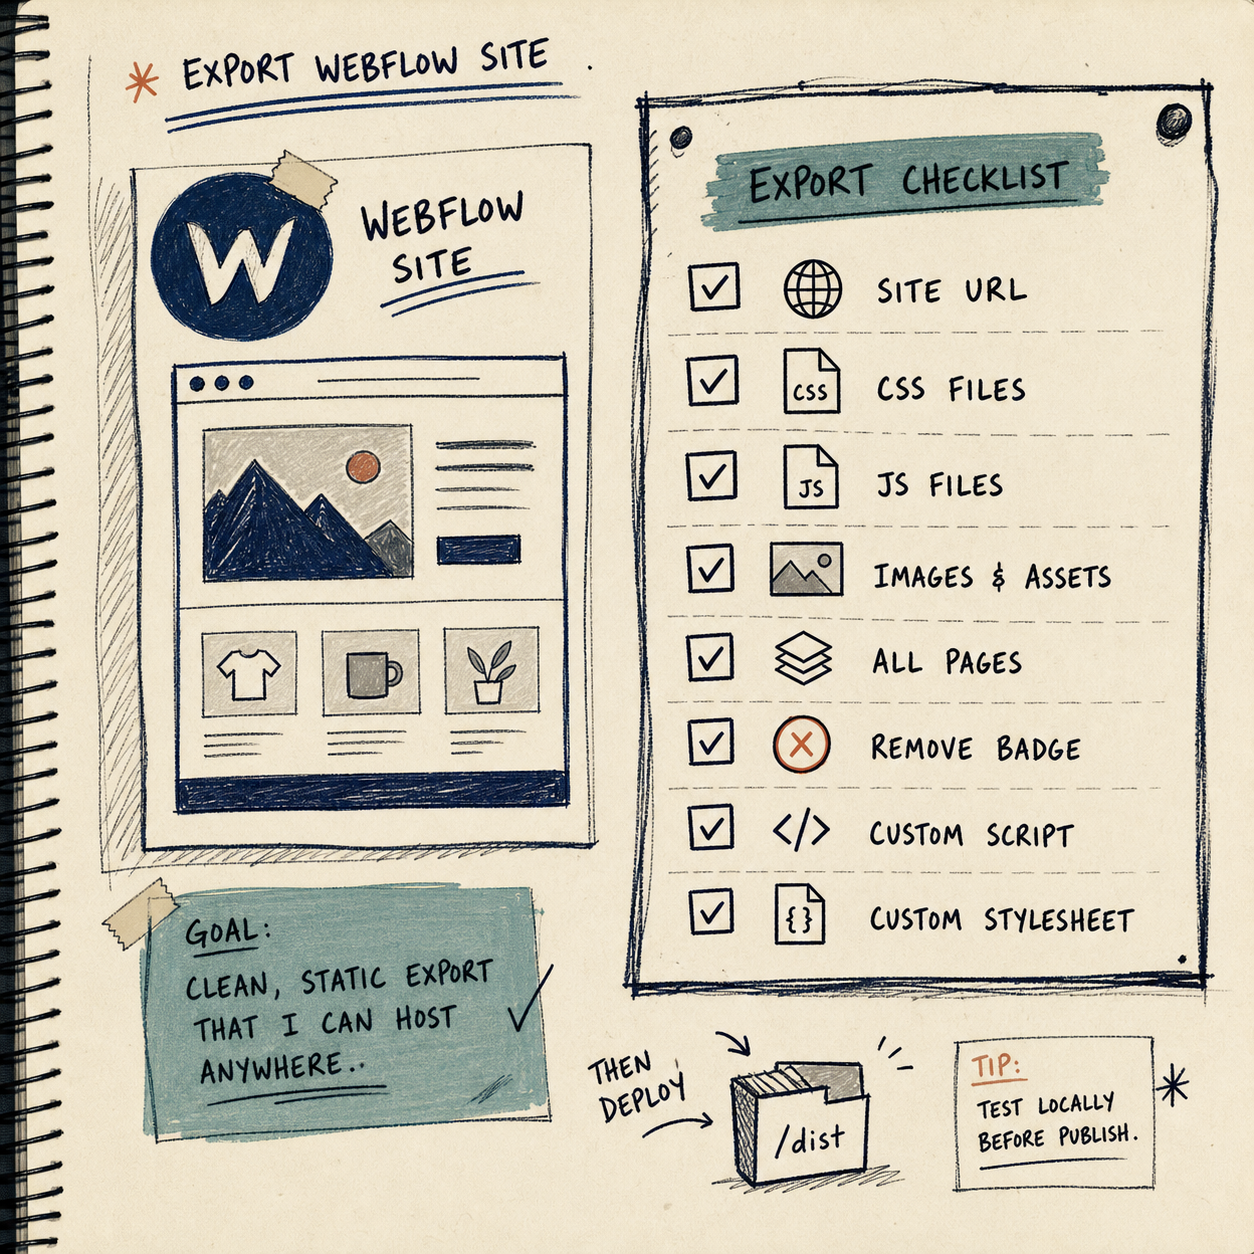
2. Set The Export Options With Intent
The useful part of an export is not the export button itself. It is choosing exactly what should come out of the project.
Here is the combination I would review first:
- URL: point ExFlow at the live Webflow site you want to capture.
- Export CSS files: keep the styling intact.
- Export JS files: preserve behavior that depends on scripts.
- Export images and media files: avoid broken asset references after the move.
- Export all pages: do not stop at the homepage if the site has a real content structure.
- Remove the “Made with Webflow” badge: useful when you want the exported site to stand on its own.
- Add custom script.js and style.css files: helpful when you want to layer in small post-export changes.
I would keep sync disabled until I knew where the site should land. The reason is simple: export and deployment are separate decisions. If you let those blur together too early, you end up debugging the wrong layer.
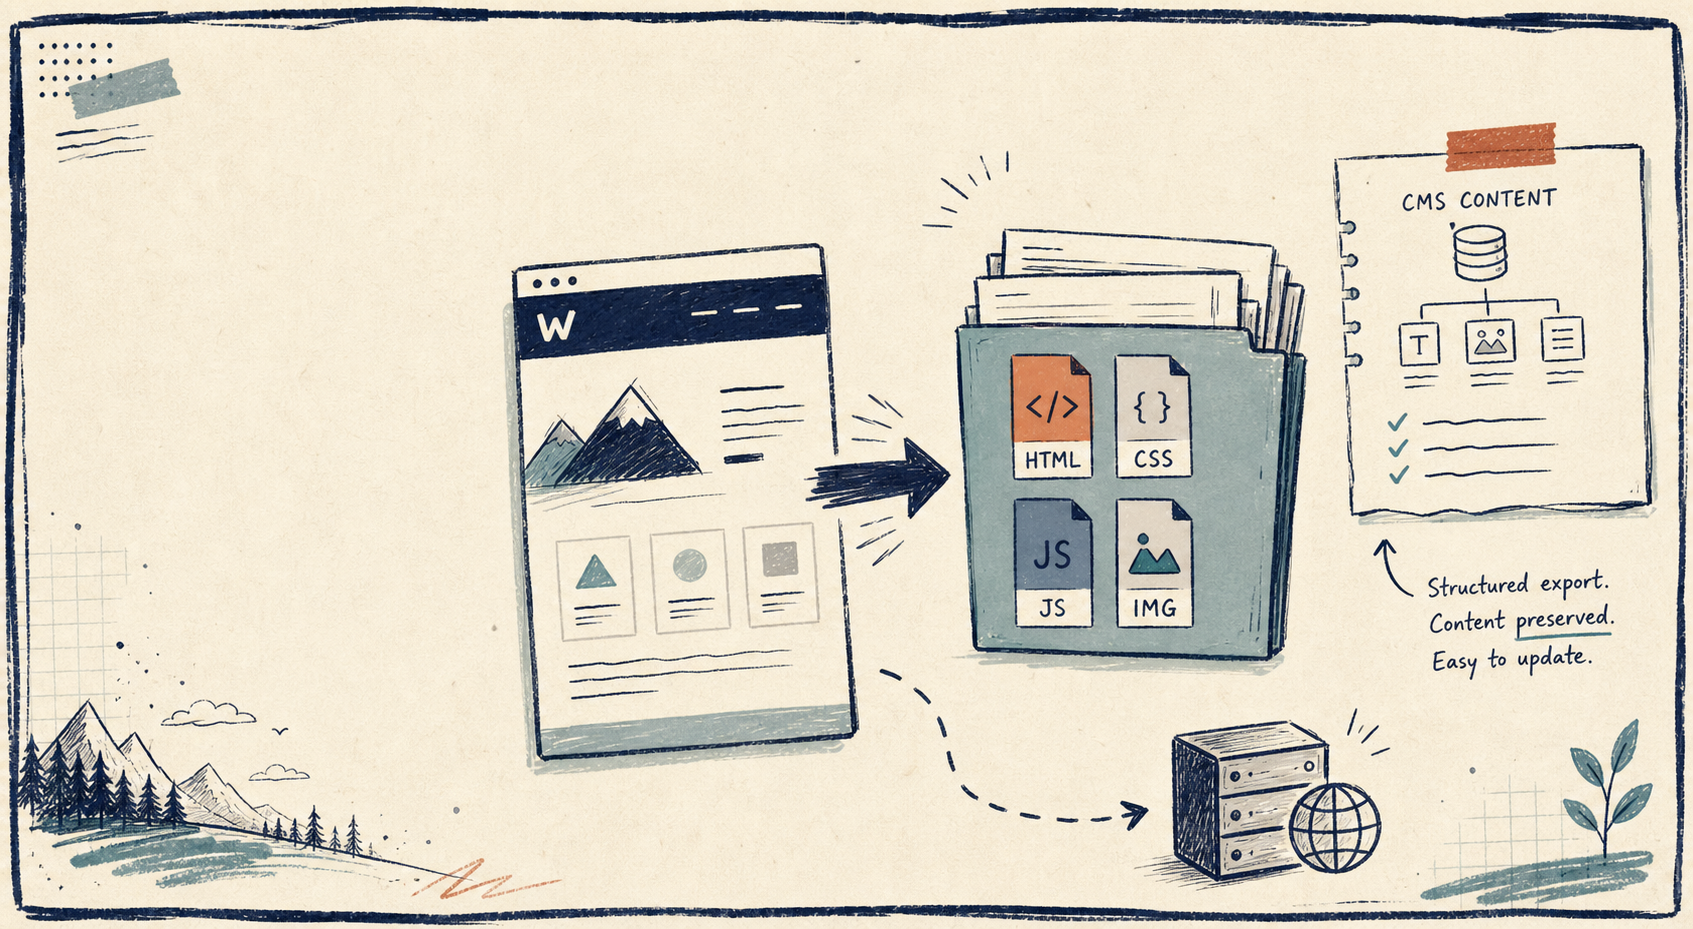
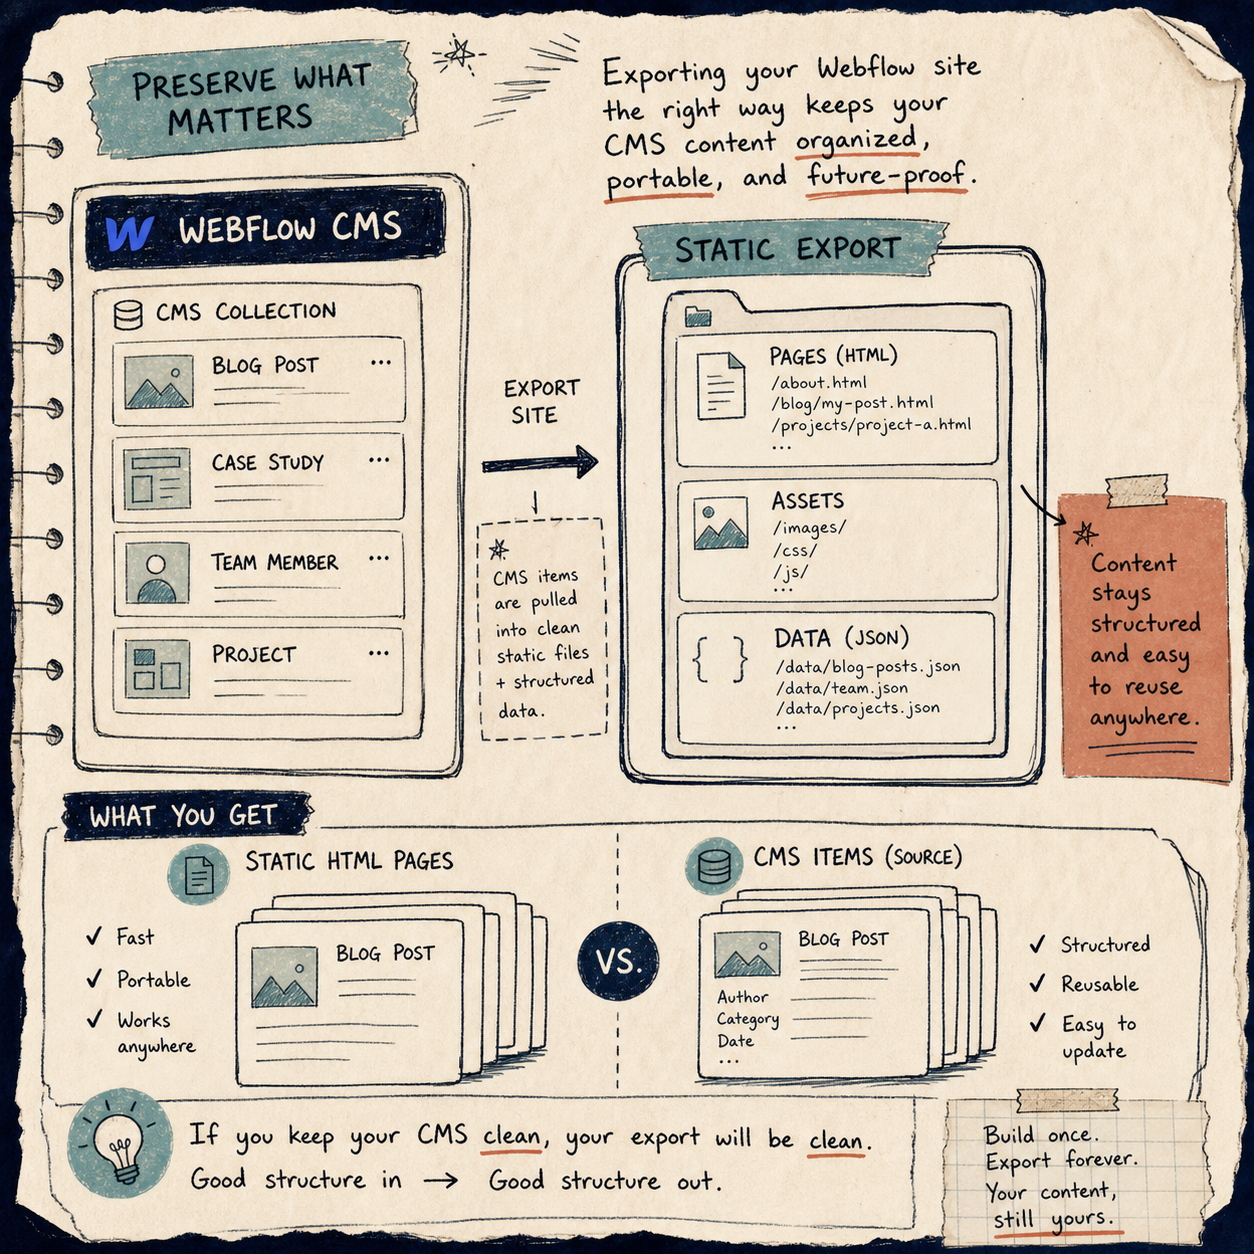
3. Verify The CMS Content Before You Trust The Bundle
This is the part most people underestimate. A pretty export is not enough if the content structure falls apart.
Webflow’s native exporter is useful for simple static output, but CMS content is where people start to feel the gap. ExFlow is the option built to export Webflow sites with CMS content in the package, which is exactly what you want when the site depends on collections, not just fixed pages.
What I check after the export:
- The key pages render as .html files, not half-finished placeholders.
- Collection-driven pages still make sense when opened from the exported bundle.
- Images, CSS, and JS load from the exported assets instead of from the live project.
- The content reads correctly offline before I move on to hosting.
If I were doing this for a real site, I would open the exported homepage, a few deep pages, and one CMS-driven page before I touched the hosting setup.
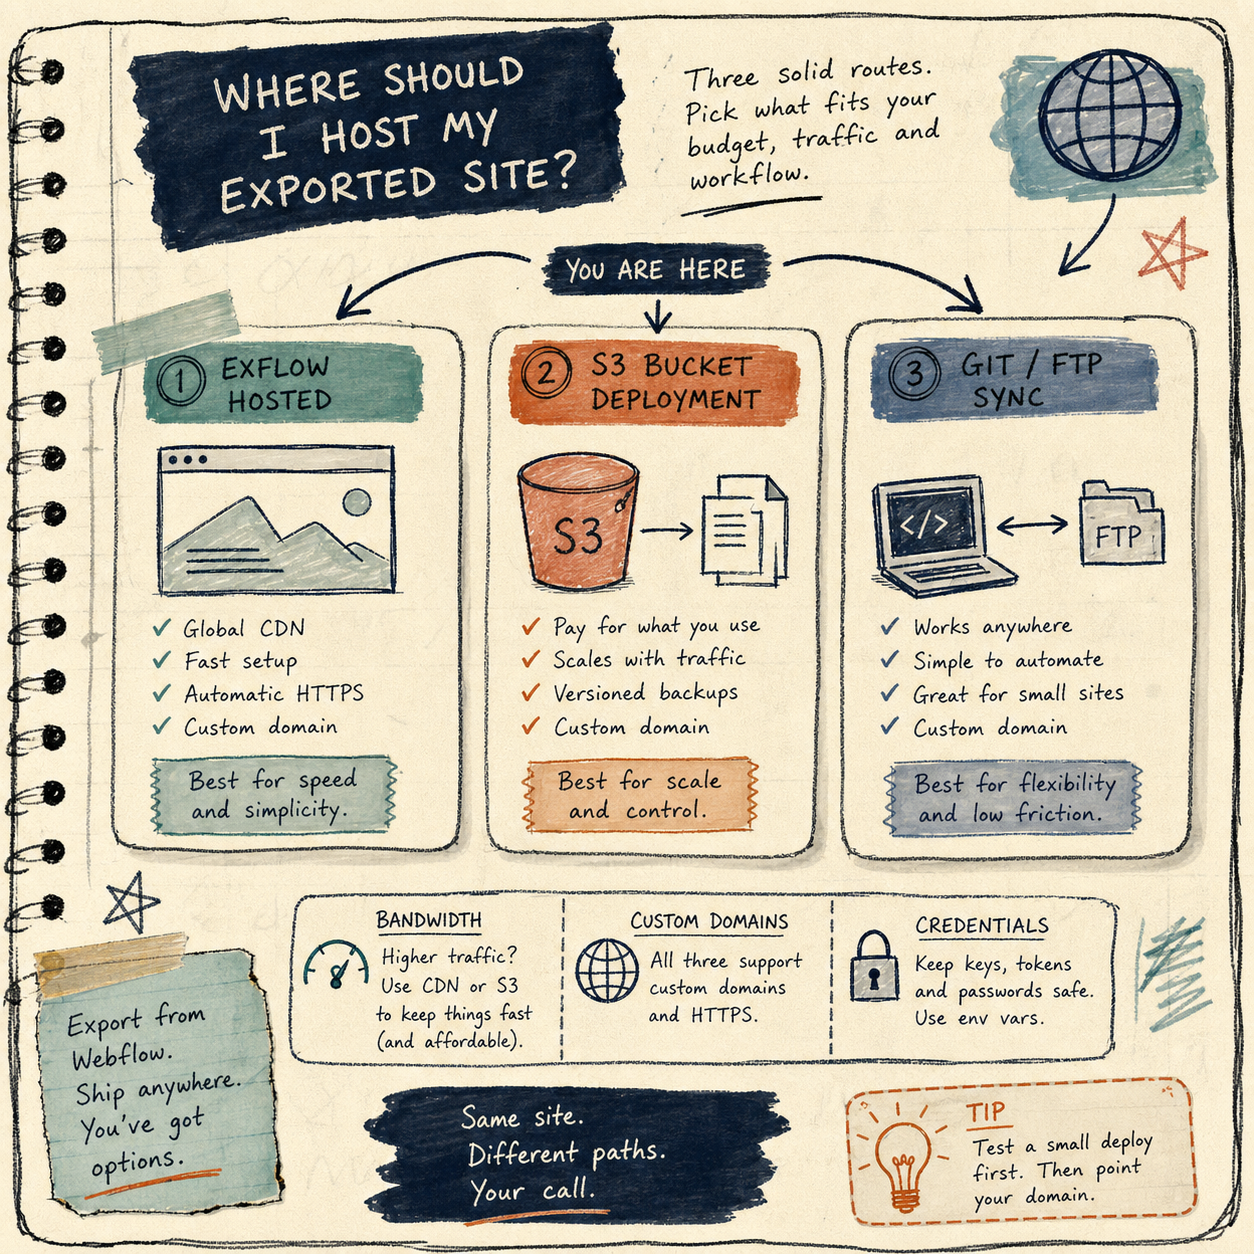
4. Pick The Hosting Path Based On Who Will Maintain It
Once the export is clean, the next question is not “what is the fanciest place to host this?” It is “who will maintain this when the site changes?”
ExFlow gives you a few sensible paths:
- Built-in hosting: good when you want the shortest path from export to live site.
- S3 sync: good when your team already thinks in static assets and buckets.
- Git sync: good when deployments should be versioned and reviewable.
- FTP sync: good when you are dealing with a more traditional server setup.
I would choose based on operational reality, not taste. If the team already lives in Git, Git sync is the obvious answer. If the site needs a simple static bucket, S3 is enough. If the site just needs to go live fast, built-in hosting is the least fussy route.
One detail I would not gloss over: sync workflows can involve credentials, so I would treat that step as sensitive. Give the export pipeline only the access it actually needs.
5. Keep A Rollback Path
The cleanest export workflow is the one you can unwind if something looks wrong.
My rule set is simple:
- Keep the original Webflow project intact.
- Keep the exported files or repo copy around after the first successful run.
- Test a few pages on the target host before announcing the move.
- If the site changes often, export on a predictable cadence instead of treating it as a one-time event.
That is also why I like ExFlow as a tool rather than a one-off trick. It lets you treat export as a repeatable process, not a rescue mission.
Related Notes
If you want adjacent examples of the same kind of workflow thinking, I would read these next:
- How to Export a Webflow Site to Static HTML with ExFlow
- How to Download a Webflow Site and Host It Yourself with ExFlow
- How to Export a Framer Site to Static HTML and Self-Host It
- How to Sync Notion Pages to Webflow CMS Step by Step
Wrap-Up
If your next move is to see whether a Webflow site can live outside the hosted stack, start with one real export at ExFlow. Check the HTML, asset paths, and CMS pages before you commit to a new host. That gives you a clean answer fast: either the export is ready to move, or you know exactly what still needs work.
The next step is straightforward: export one site, verify the static output, and only then switch hosting.