
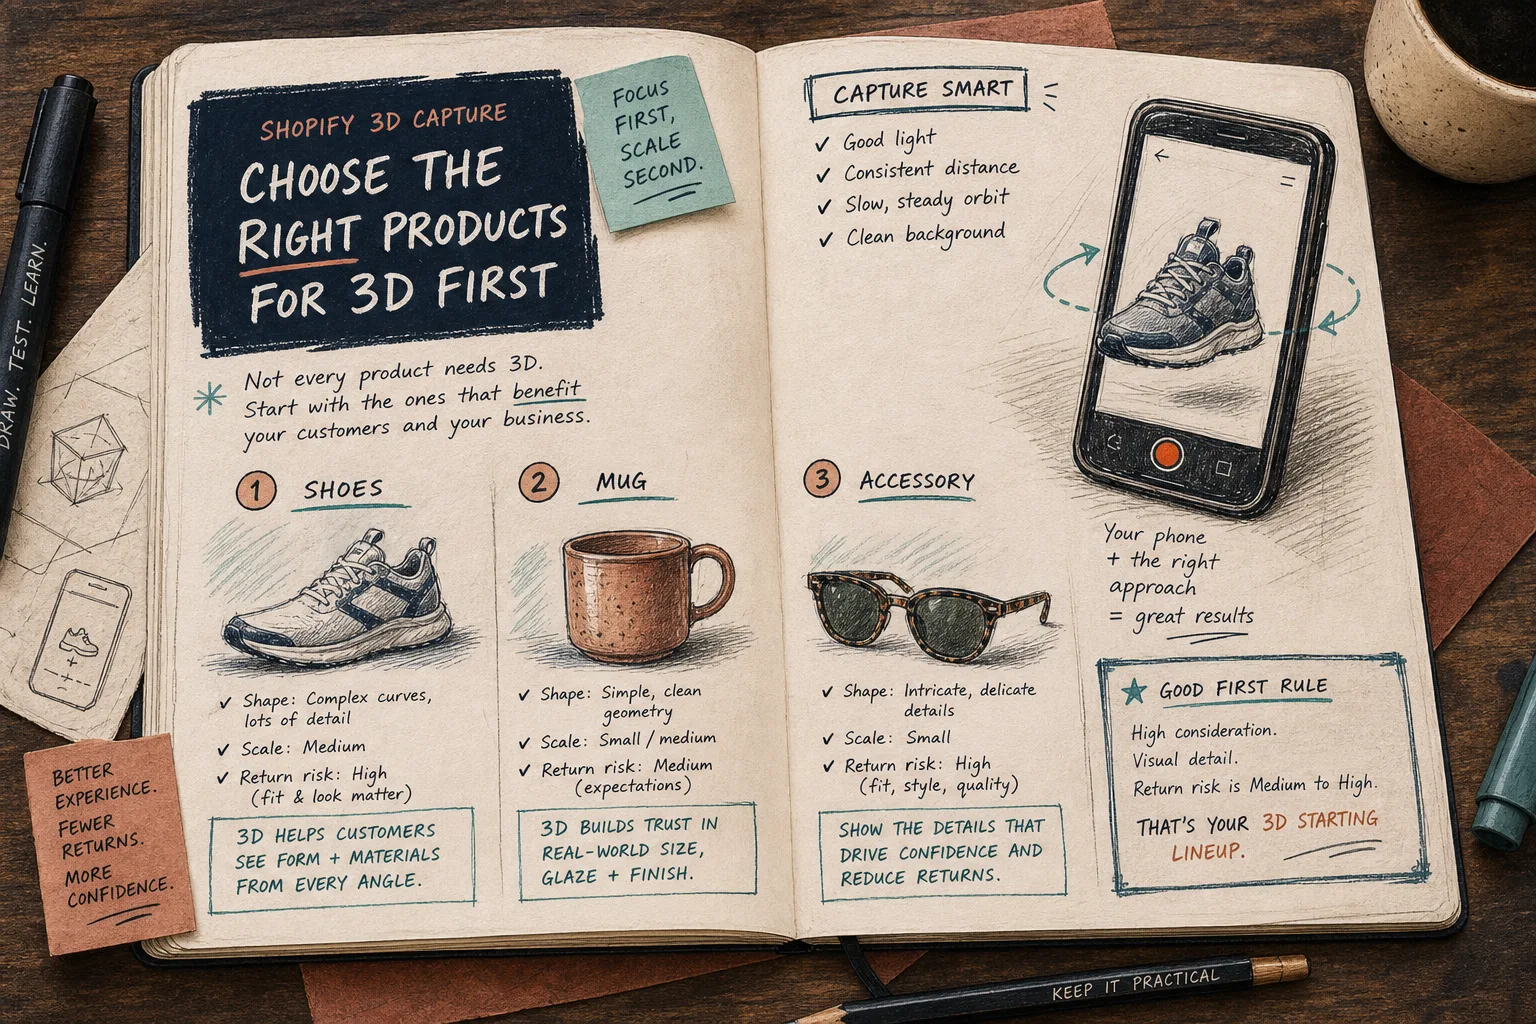
I do not start with the question, “Can this product be scanned?” I start with a simpler one: would a 3D model help a shopper understand it faster?
For the kinds of products that benefit from shape, depth, and scale, a good model can do more than another photo gallery. It can answer the “what does this really look like?” question before someone adds the item to cart. That is the core use case I have in mind when I work with Supra 3D Capture and the Shopify workflow around it.
The capture part is deliberately simple: guided phone photos, cloud processing, then a web-ready GLB you can publish into Shopify product media or place with the Online Store 2.0 theme app block. The real operator task is deciding which SKUs deserve that work first.
TL;DR: start with products that are hard to read from flat photos, drive meaningful traffic, or cause expectation gaps. Leave the easy, low-value items for later.
My First Filter: What Does Flat Photography Miss?
A product is worth considering for 3D when one photo, or even a neat stack of photos, still leaves a shopper guessing.
I look for products where 3D clarifies at least one of these:
- shape and silhouette
- scale and proportion
- depth or surface detail
- texture and finish
- fit, comfort, or how the item sits in space
That is why sculptural products usually jump to the top of the queue: shoes, bags, eyewear, bottles, home goods, decor, and anything else where the outline matters almost as much as the color.
If you want a deeper scanability pass before you touch the capture flow, I wrote about that in How I Check Whether a Shopify Product Is Scan-Ready.

The Products I Usually Put at the Top
When I rank a catalog, I do not sort by novelty. I sort by business value.
The strongest candidates usually have at least one of these traits:
- They are hero products that drive a lot of traffic or clicks.
- They create return risk because shoppers cannot judge shape or fit from flat photos.
- They have enough margin that the extra effort is worth it.
- They are visually distinctive enough that a 3D viewer becomes a merchandising feature, not just a technical add-on.
That last point matters more than people think. If the product already feels generic in the listing, a 3D model may not change much. But if the item has a signature form, a unique texture, or a shape shoppers care about, 3D can make the page feel less like a catalog and more like a decision tool.
This is also where I like to think in terms of queueing, not perfection. The broader logic is the same one I use in How to Build a Shopify 3D Capture Queue Around Return Risk: put the most consequential items first, not the easiest ones.
The Products I Usually Leave for Later
Some SKUs look interesting for 3D but are not worth the time yet.
I usually push these down the list:
- flat products that already read clearly in photos
- items where the model would not change buying confidence much
- highly reflective, transparent, or extremely shiny items
- products with moving parts that do not stay still during capture
- low-value add-ons that do not drive the page
That does not mean they can never be scanned. It just means I would rather spend the first hour on a product that can actually improve a page.
If you want a more operational filter for that decision, How to Prioritize Shopify Products for 3D Capture Without Wasting Time is the quicker version of this same idea.

A Simple Scoring Rule That Keeps Me Honest
When the catalog is bigger than the available time, I score each product on a simple 1-to-5 scale:
- shape complexity
- return risk
- traffic potential
- margin
- merchandising importance
- scan difficulty
Then I sort into three buckets:
- 20+: capture now
- 10-19: queue it
- under 10: skip for now
I like this because it forces a tradeoff. A product can be hard to scan, but if it is low impact, I am not going to spend the time. Another product can be easy to scan, but if it never matters on the page, I do not need to rush it.
That is the practical difference between “nice to have” and “worth doing first.”
For a more exact look at the readiness side of the decision, How to Tell Which Shopify Products Are Ready for 3D Models is the companion note I would hand to someone building the shortlist.
What Makes a Product Easy or Hard to Capture
A good shortlist is not just about business value. It also needs to be physically capture-friendly.
Products tend to be easier when they are:
- matte or low-gloss
- stable and not wobbly
- deep enough that the camera can find structure
- large enough to photograph comfortably
- able to sit in soft, even light
Products get harder when they are:
- mirror-like or glassy
- transparent
- too thin or too flat
- covered in tiny repeating detail that confuses the scan
- awkward to rotate without touching or moving
I think of this as a two-step test. First, does the product deserve 3D? Second, can I get a decent model without fighting the object itself?

How I Turn the Shortlist Into a Capture Queue
Once I know the right products, I keep the queue small and practical.
- Pick one hero SKU.
- Add one product that has clear return-risk upside.
- Add one visually distinctive item that should look better in a spin viewer than in a flat gallery.
- Run a test capture before I commit the whole catalog.
- Review the model quality and only then expand the queue.
That is the part I would not skip. A tiny test batch tells you more than a big plan. It shows whether your lighting is good enough, whether the product is stable enough, and whether the page will actually benefit from 3D media.
If you want the queueing logic in a more condensed form, I put the whole decision around how to prioritize Shopify products for 3D capture without wasting time into a tighter checklist elsewhere. The point is the same: do the valuable work first.
Where Supra 3D Capture Fits
This is the part where the tooling matters.
Supra 3D Capture is built for merchants who already know how to take product photos but do not want to hire a 3D artist or learn modeling software. You capture with a regular phone, the app processes the photos into a GLB, and then you attach the result to Shopify product media or place it with the theme app block.
That is enough for the product page to feel more interactive and easier to understand. It is also why choosing the right SKUs matters so much. A good workflow on the wrong products still wastes time.
If you want the app-store version, it is also listed here: Supra 3D Capture on the Shopify App Store.
The Rule I Keep Coming Back To
Do not try to scan everything. Scan the products where 3D changes the shopper’s understanding.
If you already have a short list, start with the product that combines the most of these: shape complexity, return risk, traffic, and merchandising importance. Then use a quick scan-readiness pass before you spend time on the rest.
That is the cleanest way I know to make 3D feel useful instead of decorative.
If you want to try it on one SKU, open Supra 3D Capture and start with the product that your buyers most need to inspect from every angle.