
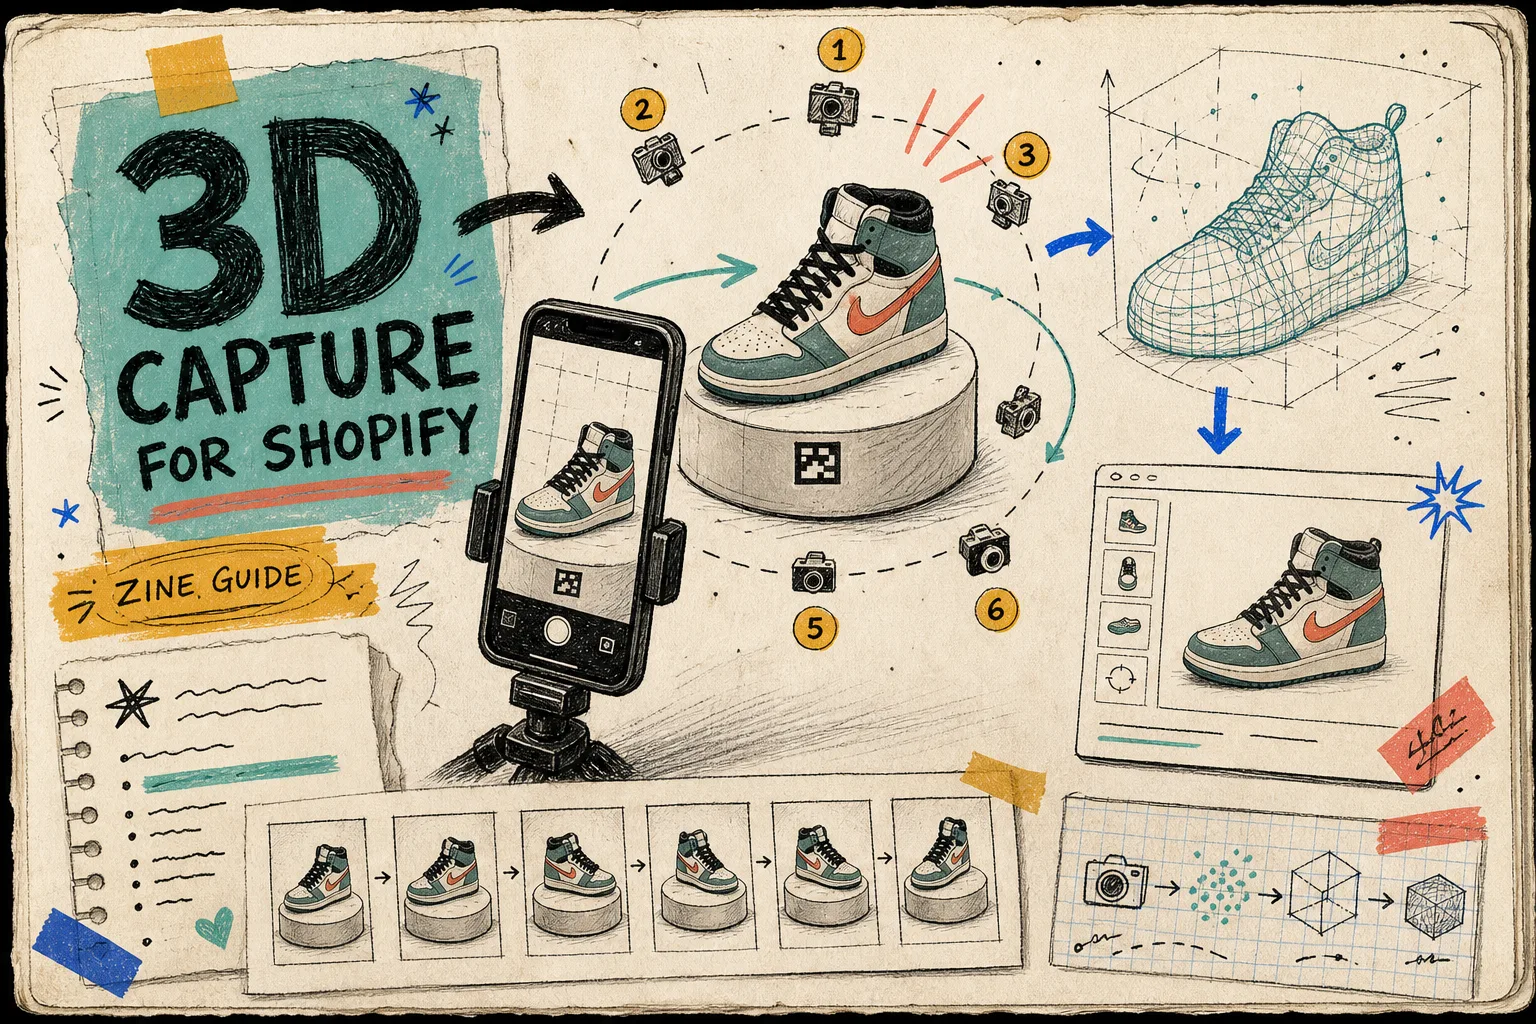
The 3D Capture Checklist I Use Before Scanning Shopify Products
I started treating 3D capture like product photography with one extra constraint: the shot set has to survive reconstruction. That sounds fancier than it is. In practice, it mostly means the table has to be clean, the light has to stay even, and the orbit has to be boring in the right way. When I keep those three things stable, a regular phone photo set turns into a clean web-ready GLB instead of another static gallery.
I keep coming back to Supra 3D Capture for that reason. It handles the part I do not want to hand-build: guided phone capture, cloud photogrammetry, and a path back into native Shopify 3D media or the Online Store 2.0 app block. No LiDAR, no special rig, and no 3D software detour.
I decide on the SKU before I touch the camera
Maybe the most useful lesson is that not every product deserves the same effort.
I use the same filter I wrote about in What Makes a Shopify Product Worth Scanning in 3D, How to Build a Shopify 3D Capture Priority Scorecard, Which Shopify Products Should You Turn Into 3D Models First?, and How to Prioritize Shopify Products for 3D Capture Without Wasting Time. If the shape tells the story, if the material has real texture, or if the customer is likely to wonder what the side profile looks like, 3D is usually worth the time. If the product is basically flat, printed, or already self-explanatory in two photos, I skip the scan and spend the effort somewhere else.
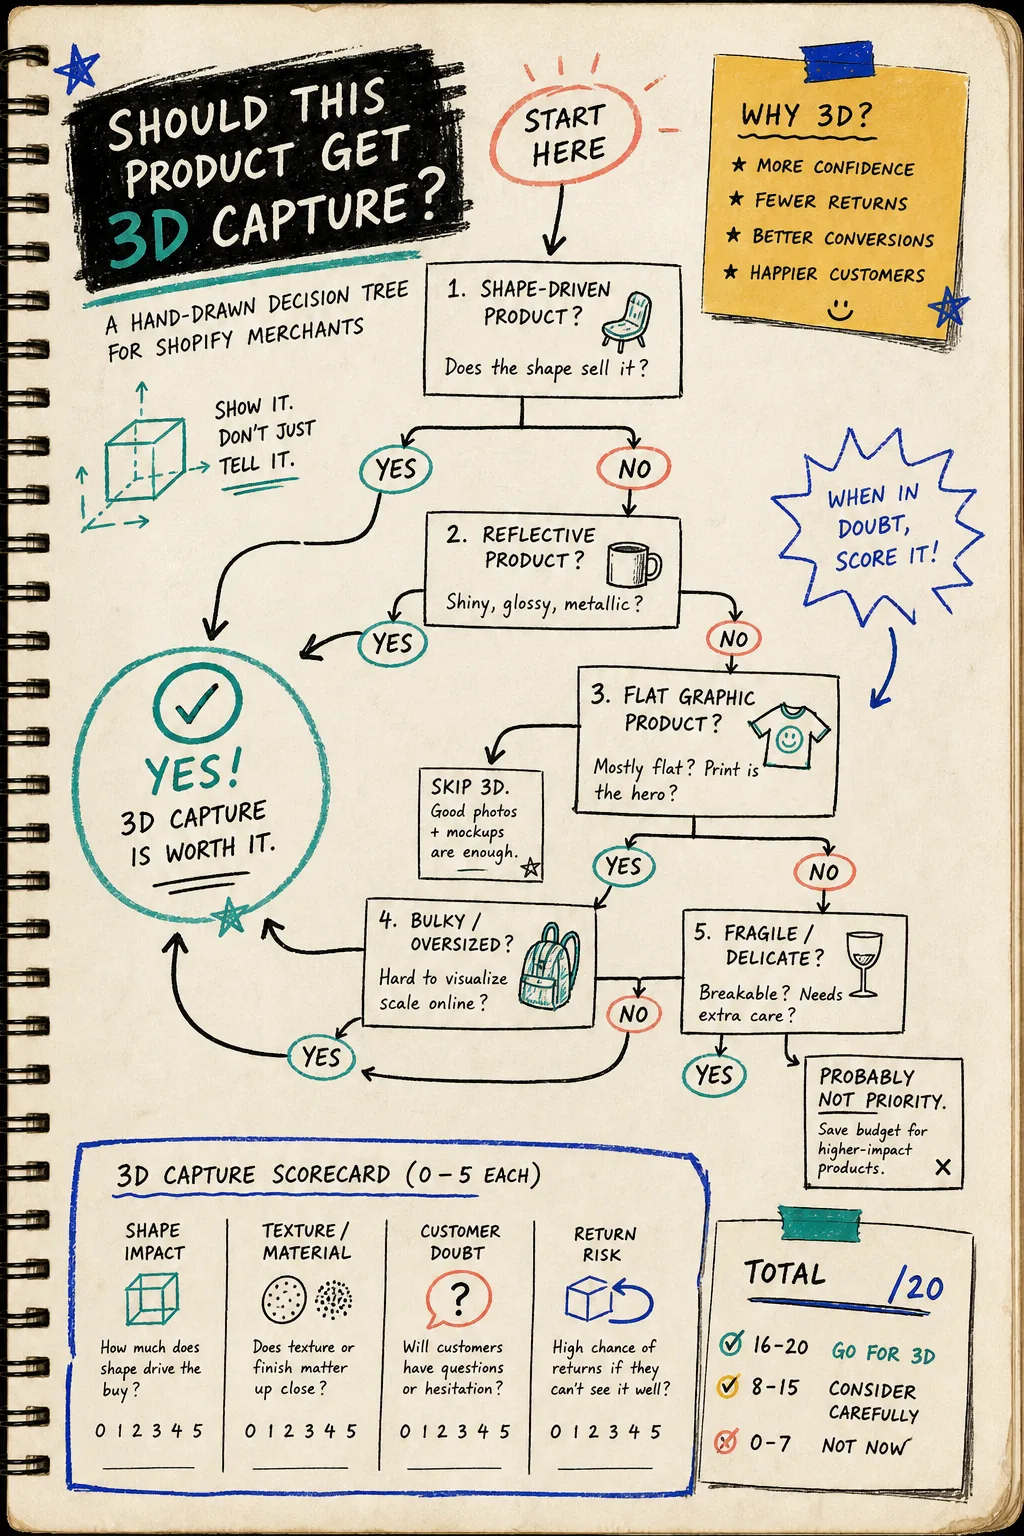
I do not start with the camera. I start with the question: does shape matter enough to justify a 3D model?
The prep work is the part that saves the model
Most bad 3D sessions are boring mistakes, not advanced failures.
- Wipe the product and clear dust before the first frame.
- Remove stray labels, packaging scraps, and anything that does not belong.
- Use one background and keep the floor around the object clear.
- Kill mixed lighting. One clean light temperature is enough.
- Leave enough room to walk around the object without bumping into the setup.
- Keep hands, cables, and reflected clutter out of frame.
If I am scanning something shiny, clear, or fuzzy, I slow down even more. Those materials need a cleaner setup because the camera is not just seeing shape; it is trying to make sense of reflections and texture at the same time.
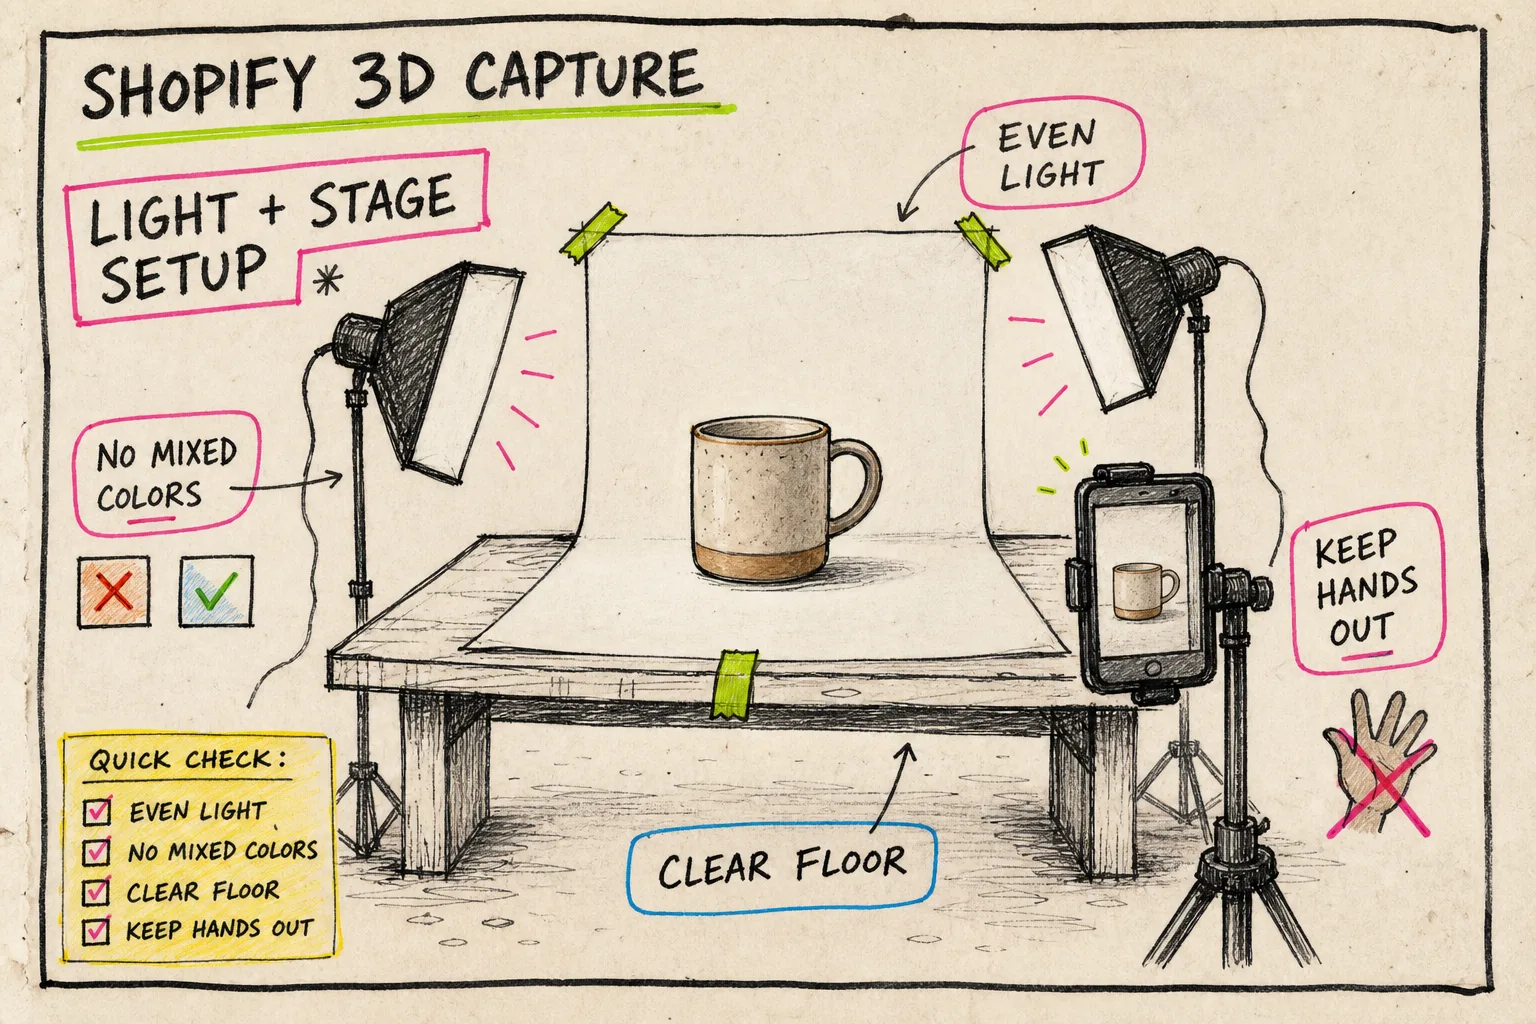
Even light matters more than expensive gear. I want a setup I can repeat, not a setup that only looks clever once.
The orbit I actually use
The capture itself is less mysterious than people expect.
- Start at roughly eye level with the product.
- Take a first ring of 10 to 12 shots around the object.
- Move your feet a little between shots, not the product.
- Keep the object centered in frame so the overlap stays consistent.
- Add a couple of slightly higher or lower angles if the shape needs it.
- Do not chase perfection between frames; consistency beats drama.
That is the whole trick. The app can guide the session, but the orbit still needs discipline. Ten good photos beat twenty chaotic ones, and steady spacing beats clever camera moves.
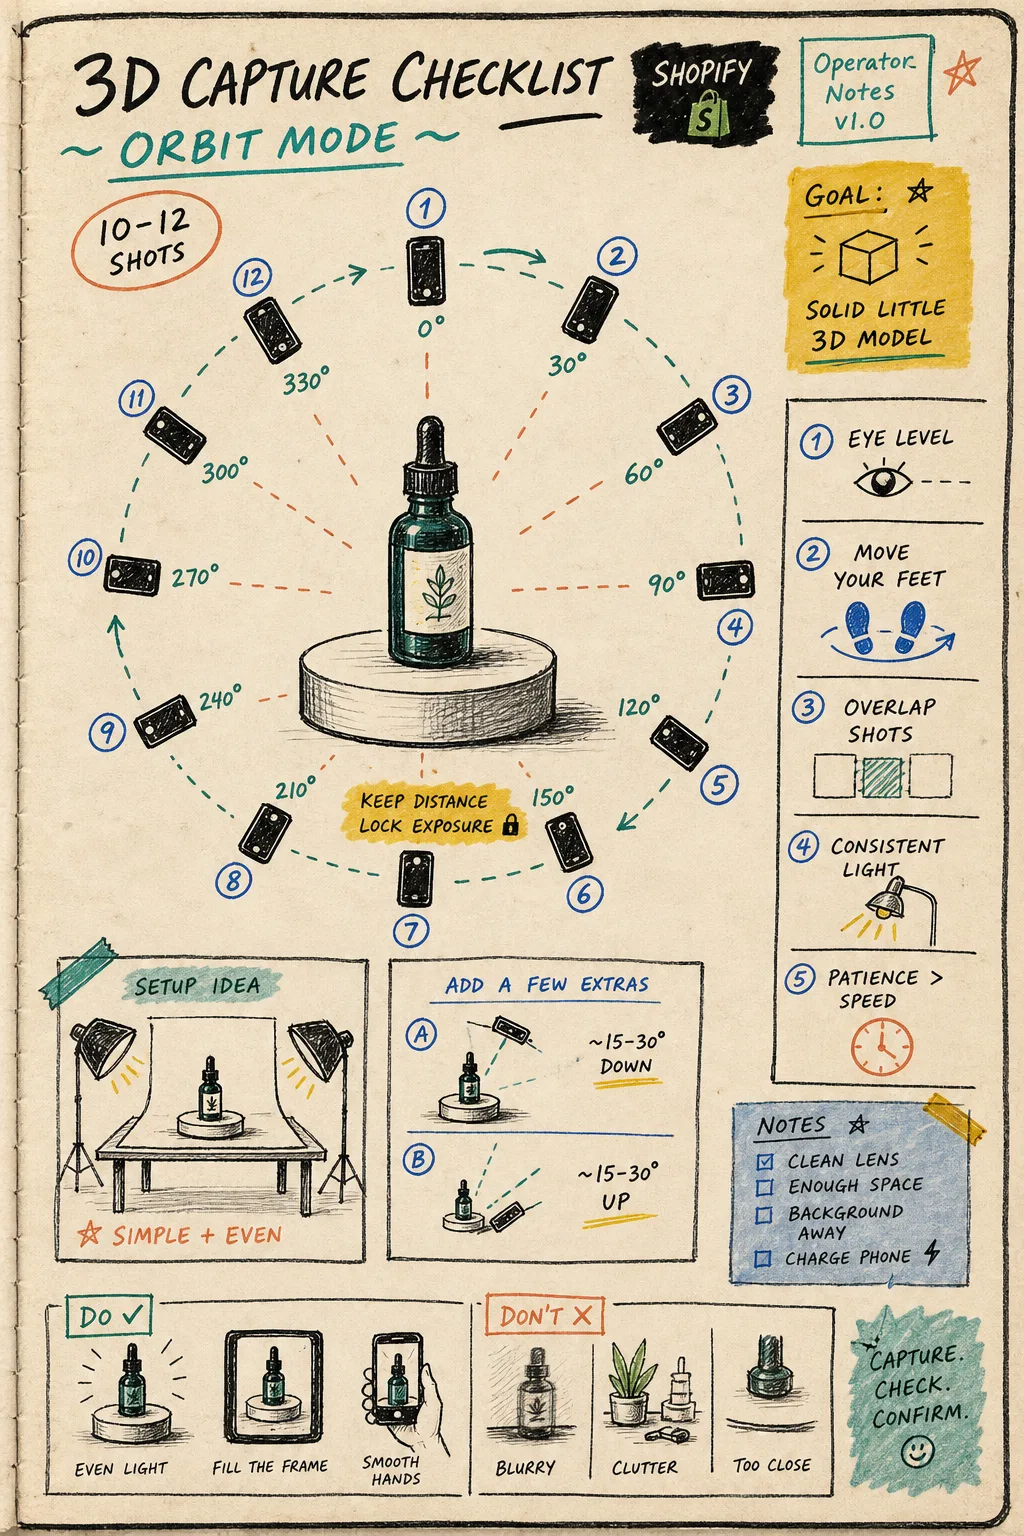
This is the move: steady distance, overlapping angles, and enough coverage that the photogrammetry step has something to reconstruct.
What I want after processing
After the upload, I want a GLB that is clean enough to publish without babysitting.
The point is not to create a cinematic 3D artifact for its own sake. The point is to give a shopper something they can drag, rotate, and inspect before buying.
What I like about the Shopify path is that the model can land in native 3D product media when the theme supports it, or sit in an Online Store 2.0 app block where it belongs. That keeps the output close to the product page instead of turning it into a separate asset that marketing has to explain later.
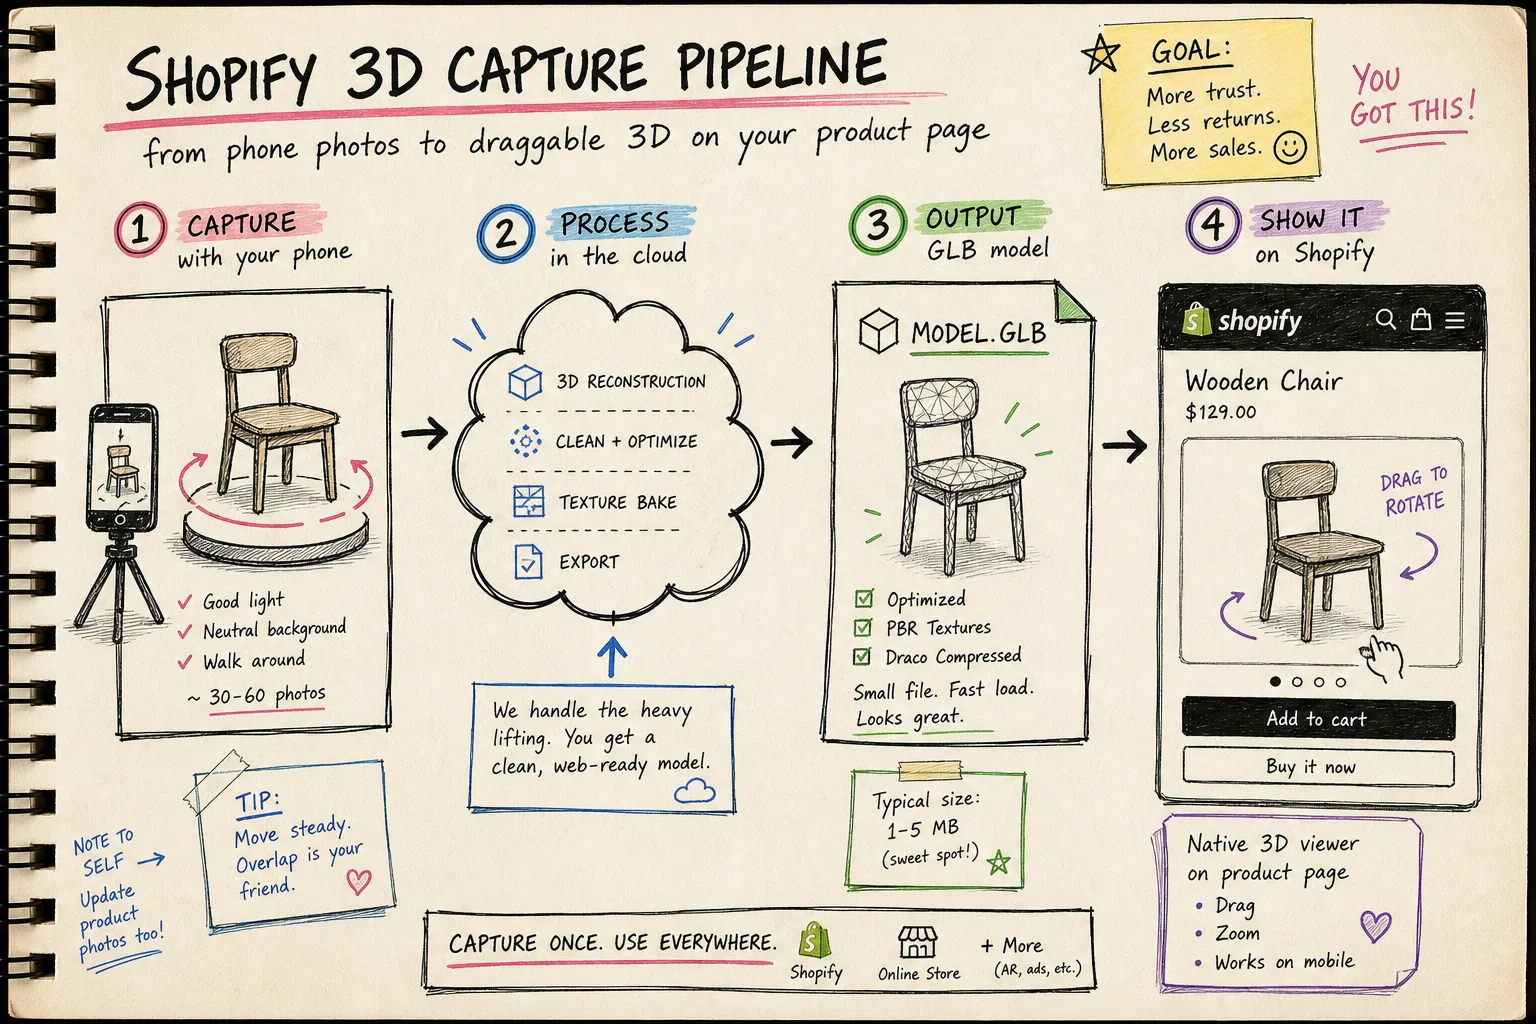
Phone photos in. Processed GLB out. Then it can live where shoppers already make the decision.
My cutoff point
If a product needs 3D to answer a real shopper question, I scan it. If it only needs better photo styling, I do not pretend 3D will fix that.
That is the practical line. 3D capture is useful when it reduces uncertainty, shows the shape honestly, and makes the page feel more interactive without inventing drama. It is not a magic conversion switch. It is a better way to show things that flat photos keep flattening.
If you want the tool itself, the Supra 3D Capture app and its Shopify App Store listing are the place to start. Put one product through the checklist, publish one model, and see whether the page feels clearer after that.