
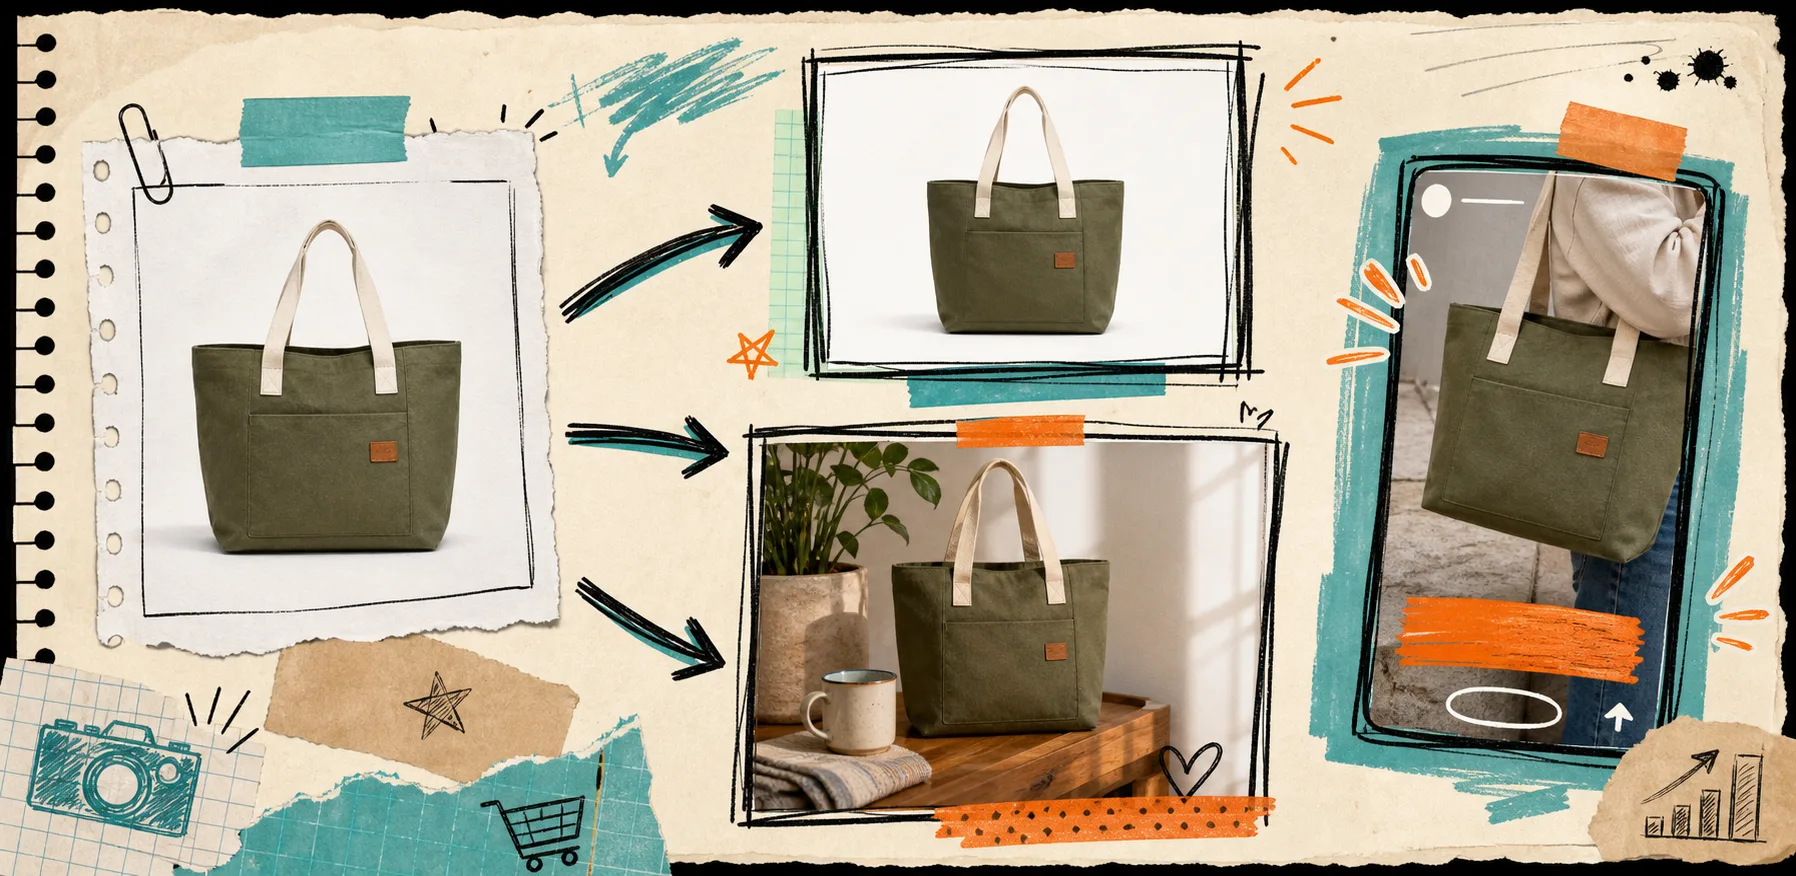
I keep seeing the same mess in Shopify stores: one product has a clean studio shot, another has a phone-capture background, and then ads get improvised with whatever image was closest to good enough. That is where I have found Supra AI Photo Studio useful. It keeps the photo work inside the Shopify workflow and gives me a repeatable way to move from one source image to a set of consistent outputs.
The app listing is here and the landing page is here. There is also a demo trailer if you want to see the motion output before trying it.
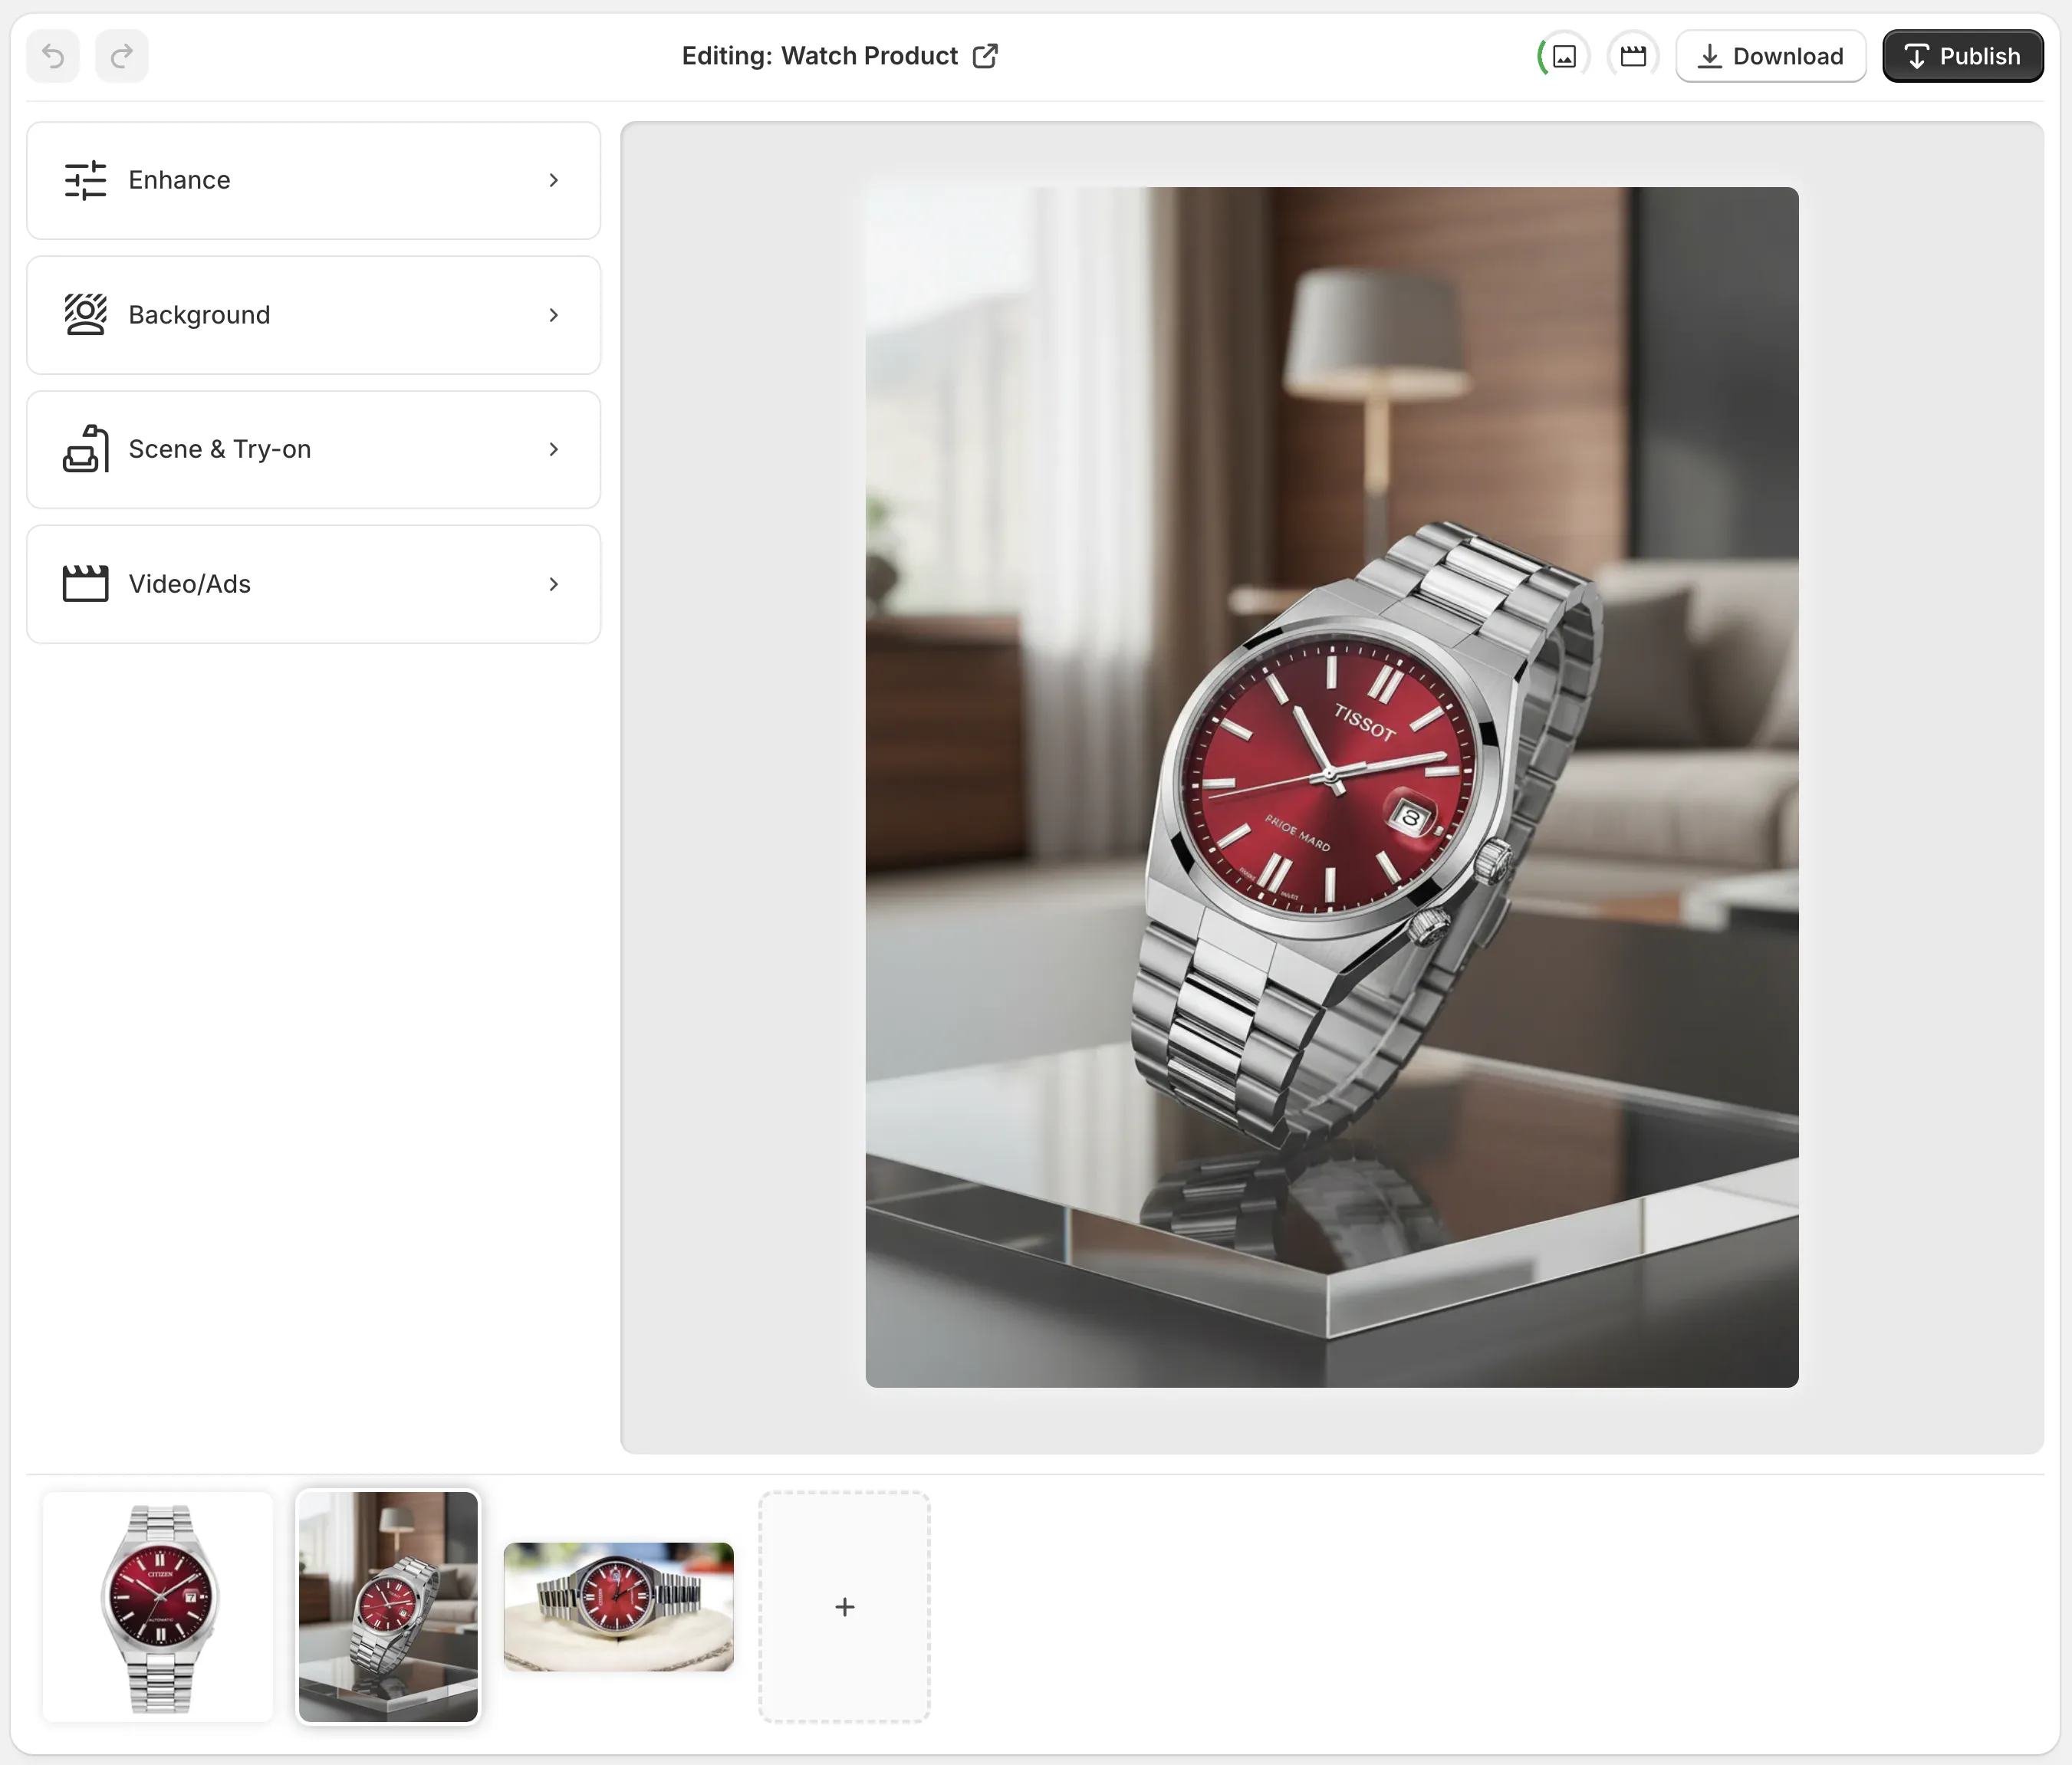
Start With The Source, Not The Effect
I do not start by asking, What can AI make this look like? I start by asking, What does this product already deserve?
If the source is blurry, uneven, or poorly framed, I clean that up first:
- remove the background
- fix lighting and color
- sharpen or upscale if the image is too soft
- keep the product edges honest
That order matters because the downstream outputs stay more believable when the base image is stable. If I am deciding which assets should be prioritized, I usually pair this post with How I Prioritize Shopify Product Photos for AI Editing and How to Decide Which Shopify Products Need Try-On, Placement, or Video.

The Four Jobs I Use Most
Supra AI Photo Studio has enough surface area to do a lot, but I still think about it as four jobs.
1. Repair the original
Use enhancement when the photo already has the right product, but the image just needs help. This is the least risky edit and usually the first thing I test.
2. Make the product feel owned by the brand
Try-on is useful for apparel, accessories, and jewelry. Object placement is better when I want the product to live in a kitchen, studio, boutique, desk, or outdoor scene. Both are about context, not drama.
3. Generate marketing-specific variants
Once the catalog image is stable, I move into ad-friendly assets. That is where the b-roll and UGC-style video features matter. They let me turn one good photo into something that feels native to paid social without hiring a separate production crew for every test.

4. Build mockups without rebuilding the whole design stack
If a product needs a logo, pattern, or print embedded into a mockup, I use that instead of opening a separate mockup tool and trying to keep the result aligned by hand.
The Consistency Rules I Actually Keep
This is the part that saves me from making a store look like five different vendors.
- Keep the crop and camera angle stable across a product family.
- Pick one lighting family and stick to it.
- Do not generate every output from scratch if the original already works.
- Use try-on and placement for context, not for hiding weak product detail.
- If the product is going to land in ads and on the PDP, make the hero image and the promotional image feel like they came from the same brand.
That last point is why I like thinking in terms of a full visual system instead of one better photo. I want the listing, the collection grid, the campaign image, and the short clip to agree with each other. If that problem sounds familiar, How to Turn One Product Photo Into Listings, Lifestyle Shots, and Ads is the closest earlier version of this workflow, and How I Build a Shopify Product Page Around a 3D Model is the next layer up when you want richer product storytelling.

Where I Would Use It First
If I were rebuilding a catalog from scratch, I would start with:
- products that already convert but look visually inconsistent
- products with one decent source photo and no supporting lifestyle content
- products where the team keeps making custom ad assets by hand
- products that need a fast test of try-on, placement, or short video before committing to a full shoot
That order is boring, which is why it works. It keeps the work anchored in the actual commercial problem instead of the novelty of the tool.
A Simple Working Loop
My loop looks like this:
- Import the original product shot.
- Clean up the source until it feels trustworthy.
- Make one catalog-safe version.
- Make one lifestyle or try-on version.
- Make one ad or motion version.
- Compare the outputs side by side and kill anything that feels off-brand.
I am not trying to get eight variations out of the gate. I am trying to get one consistent base that can feed the rest of the store.
If you want to see the app from the product side, the landing page at Supra AI Photo Studio is the quickest overview. If you want to see the feature mix in the shop context, the Shopify app listing at apps.shopify.com/supra-ai-photo-studio is enough to understand the core use cases without much setup.
Why I Still Care About The Base Photo
A lot of AI photo workflows fail because they begin at the wrong end. They start with generate something cool and end with a catalog that looks inconsistent. Supra AI Photo Studio works better when I treat the original image as the anchor and the AI output as the controlled variation.
That is also why I keep coming back to the source-photo decision. If the original is weak, fix it. If the original is good but boring, place it somewhere believable. If the product needs human context, use try-on. If the product needs motion, move into video. The tool is useful because it lets me choose those paths without leaving the workflow.
The Short Checklist I Would Use Today
- Do I have one source image worth improving?
- Do I need a cleaner catalog shot, a lifestyle shot, a try-on, or video?
- Will the output still look like the same brand if I put it next to the rest of the store?
- Am I changing the product, or only the context around it?
- Would I be comfortable using this image on the PDP and in an ad set?
If the answer to the last question is no, I usually keep editing.
For a more decision-heavy version of that thinking, I would revisit How I Prioritize Shopify Product Photos for AI Editing and How to Decide Which Shopify Products Need Try-On, Placement, or Video. They make the what should this product become question much easier to answer.
The Part I Would Actually Ship
I would not chase perfect outputs. I would ship the smallest visual system that keeps the store coherent:
- one clean hero image
- one context shot
- one marketing-ready variant
- one short clip if the product benefits from motion
That is enough to make most Shopify catalogs feel more deliberate without turning the photo process into a second job.
If your product photos are already close and the problem is consistency, Supra AI Photo Studio is worth testing first. If you want the broader picture before you install anything, open the landing page and the demo trailer, then rebuild one SKU the same way you would for a launch. The goal is not more AI. The goal is one visual language across the store.